Note: This feature is only accessible to Administrator users! Learn more about user types.
Locations, as well as employee departments allow you to control the grouping, and permission scoping of employees across VacationTracker.
Adding a New Location to VacationTracker
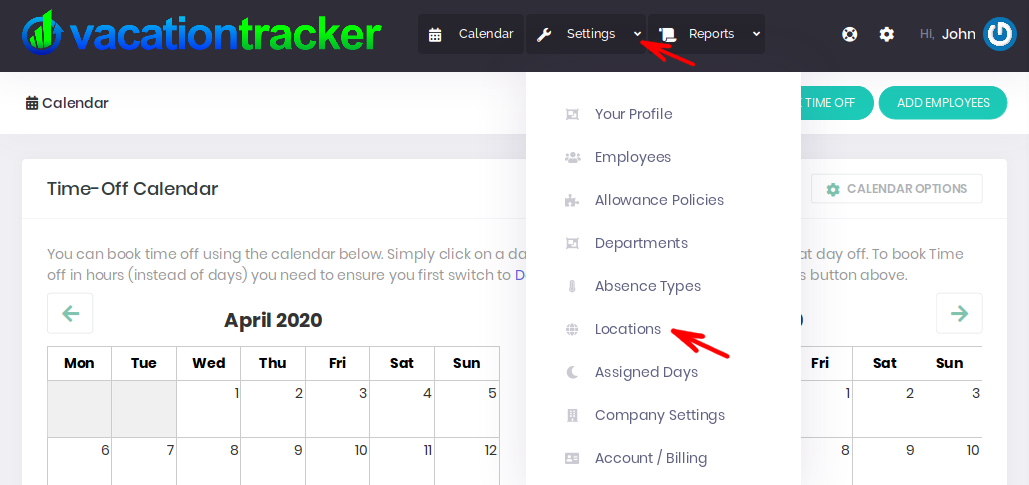
Once logged in from your VacationTracker Dashboard, click on Settings followed by Locations from the setting drop-down menu as shown below:
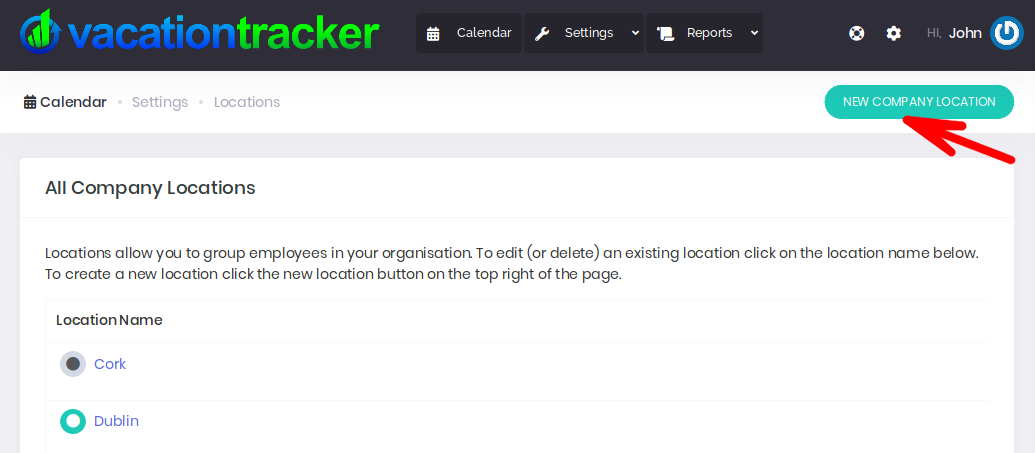
From the Locations listing page, click New Company Location, as shown below:
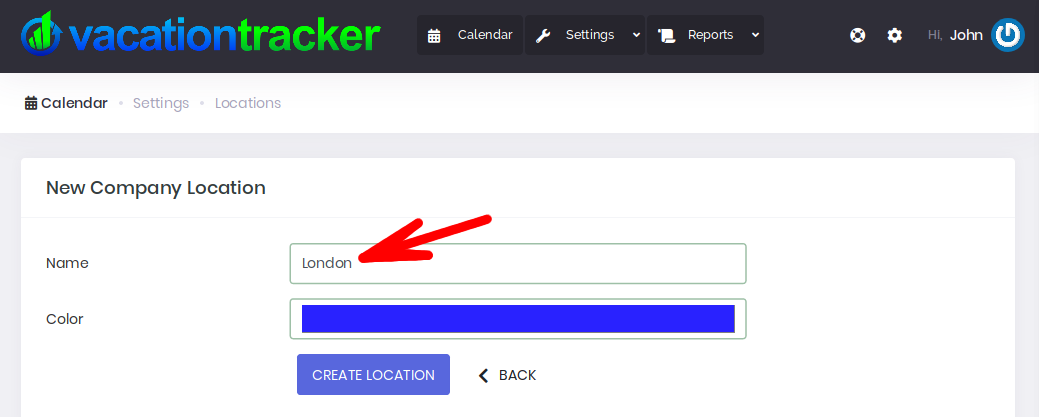
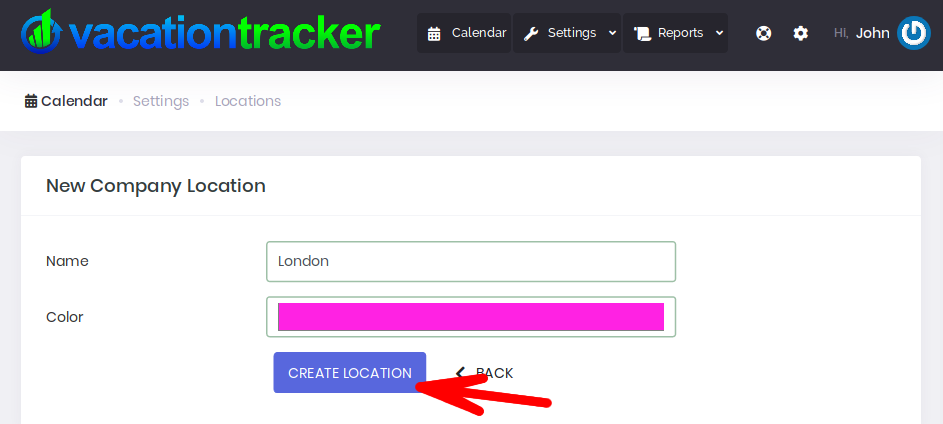
From New Company Location Page enter the name of the new location into the field provided, as shown below:
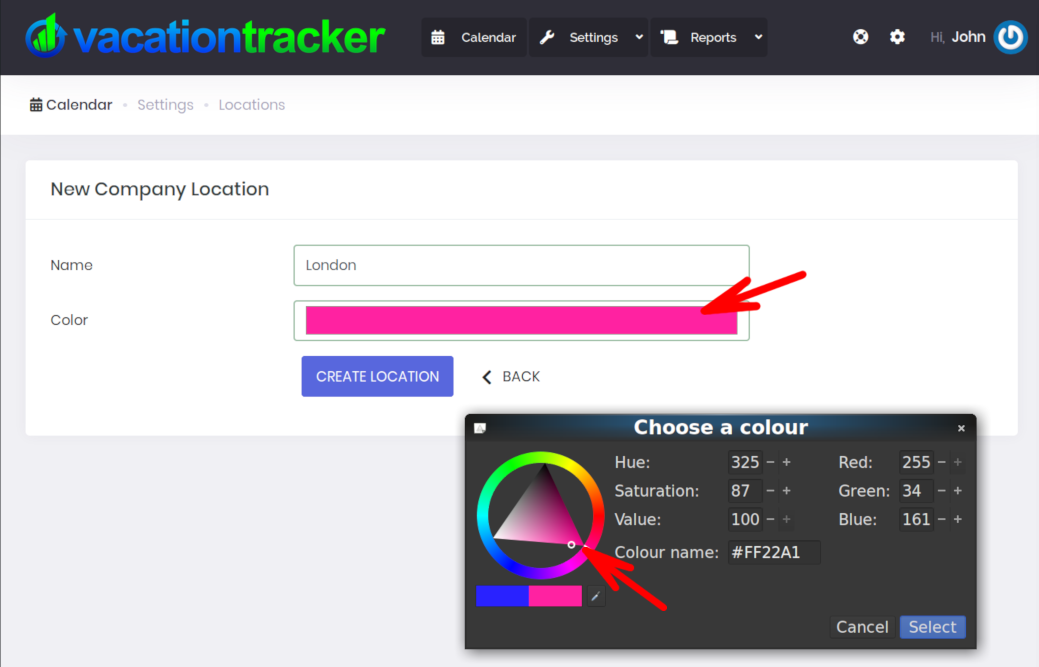
Assign a color your Location using the color selector that displays when you click on the color field:
When finished, click on the Create Location button:
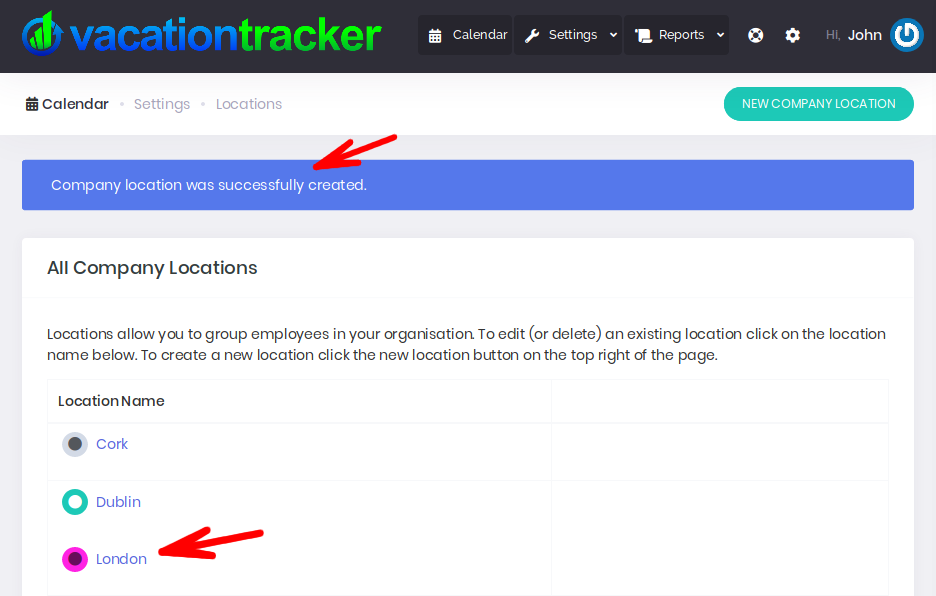
You’ll be returned to the Location Listing page and a notice will inform you that the new Location was added successfully - you will see the new Location displayed along with your other existing Locations:
If you need to add/create more Locations simply repeat the above steps as many times as you need to. You can then edit any existing employees to change their location to the newly created location.
Editing An Existing Location
Once logged in, click Settings followed by Locations from the setting drop-down menu as shown below:
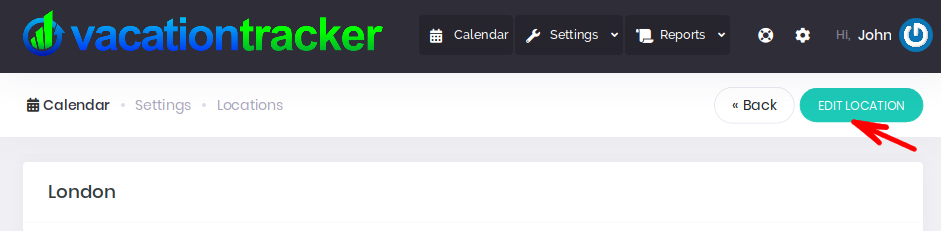
From the locations listing page, click on the name of the Location that you want to edit:

From the Location page click on the Edit Location button:
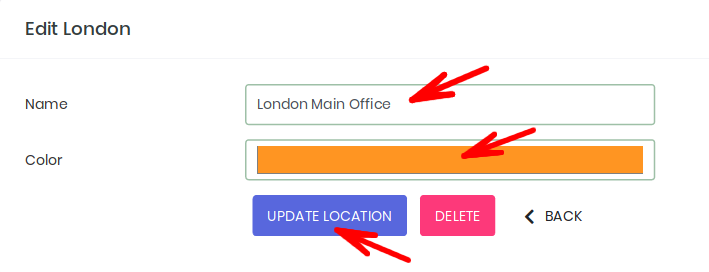
You are now on the Editing Page for that Location and you can edit the details. Remember to click Update Location when you are ready to save your changes:
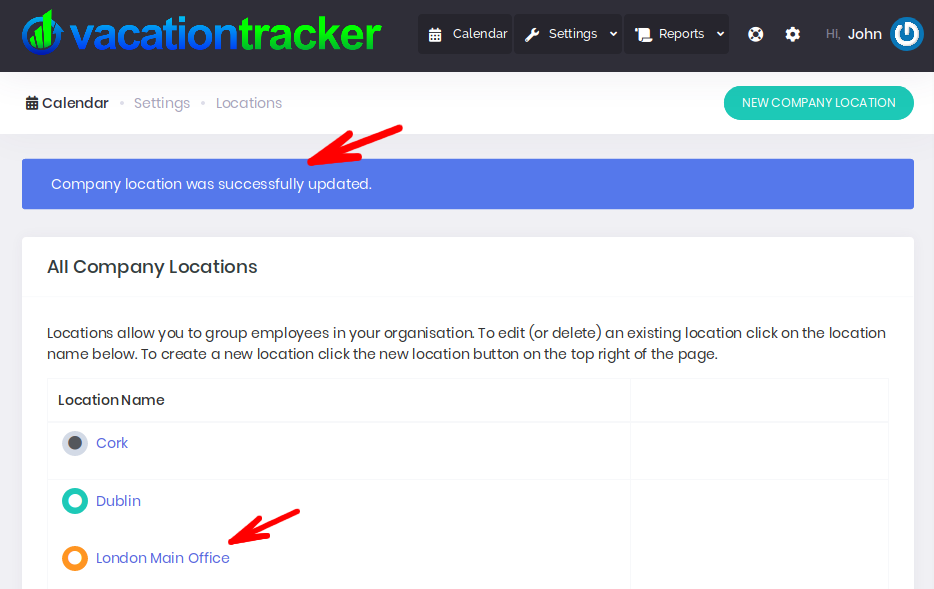
You’ll then be returned to the Locations listing page along with a notice to inform you that edit was successful. You will see the changes you made displayed below, in the case of our example here, “London” has been renamed to “London Main Office” and we have changed the assigned the color from pink to mustard:
You can edit an existing Location as often as you want, just follow the above steps.