What are Absence Types?
Absence Types allow you to categorize the different types of absence or leave across your company. Vacation Tracker tracks Employee Time-Off as a series of time-off events & each event has an Absence Type (Leave Type) associated with it. These Absence Types are fully reportable from each Employee page as well as within the Vacationtracker reporting area.
By default when you sign up to Vacation Tracker you’ll have several different absence types created for you.
The default absence types are:
- Time Off
- Sick Leave
- Jury Duty
- Maternity
- Statutory/Public
- Weekend
You can create additional Absence Types, modify any of the existing defaults or event delete them if you wish.
How Do I Create a New Absence Type?
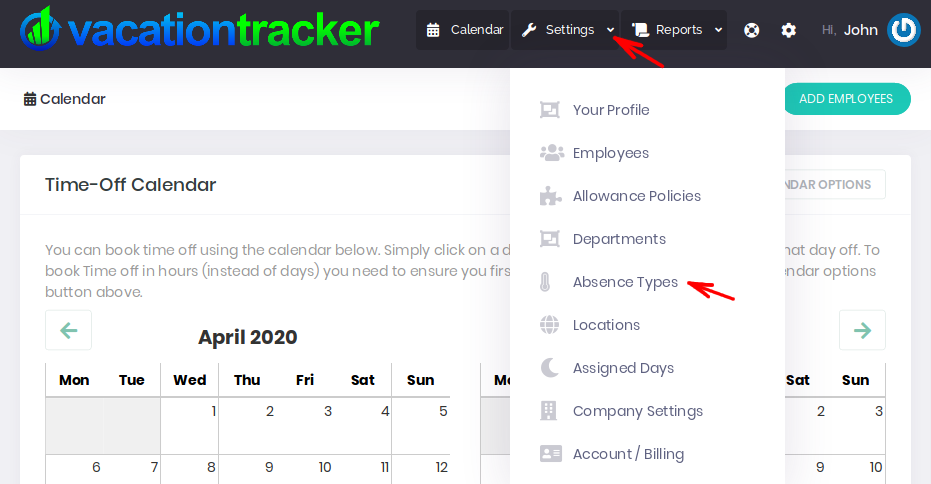
From your Vacation Tracker Dashboard, click on the Settings arrow to reveal the drop-down menu and then click on Absence Types:
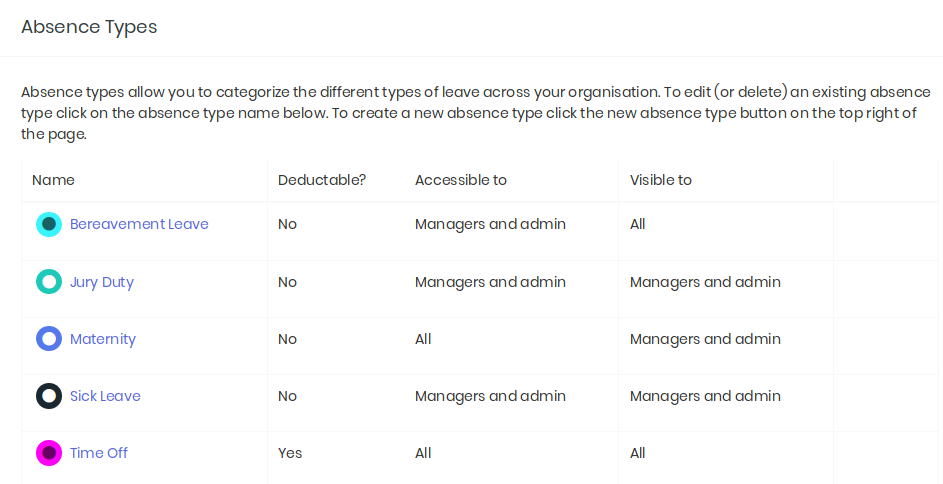
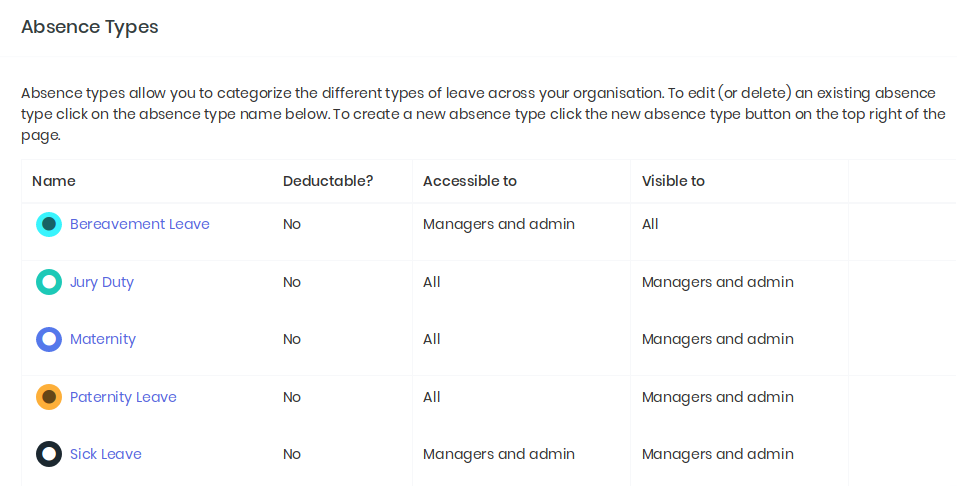
You are now on the main Absence Types Page and you will see your list of existing Absence Types displayed:
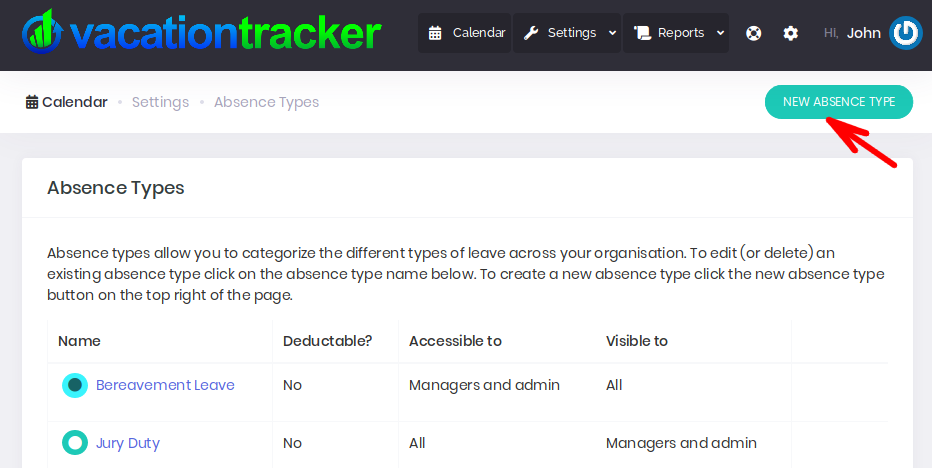
Next, to create a new Absence Type, click on the New Absence Type button to the right of the screen, as shown below:
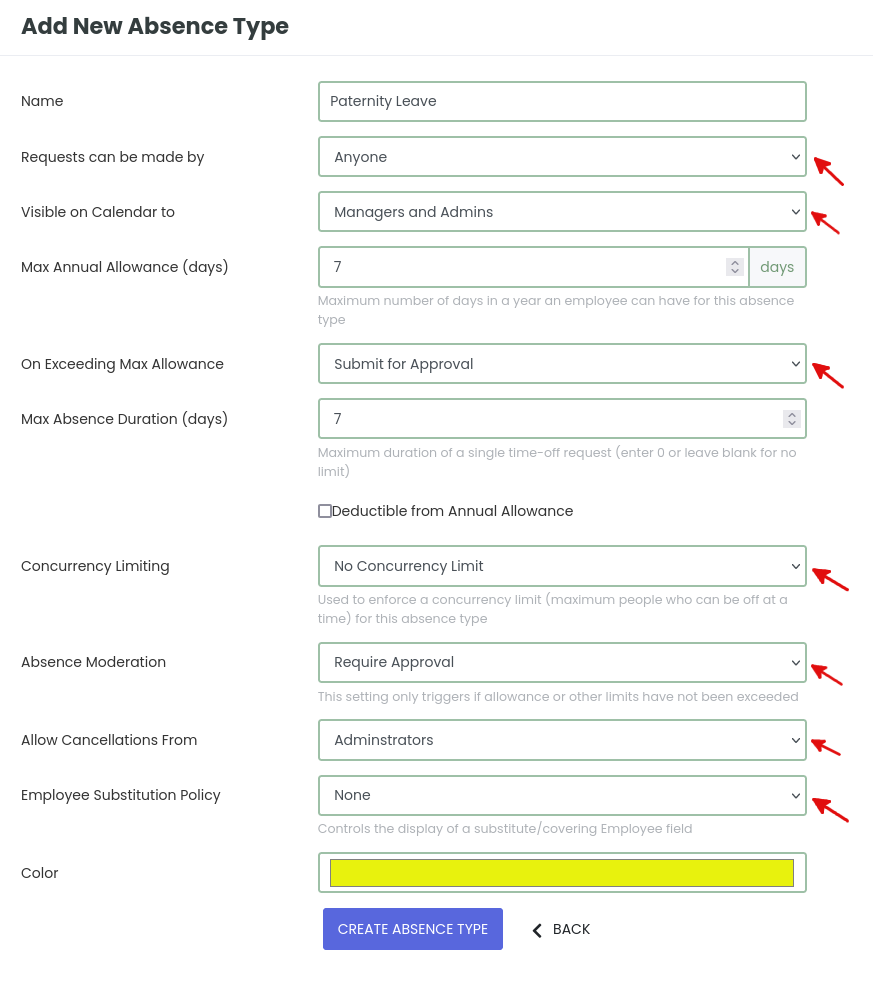
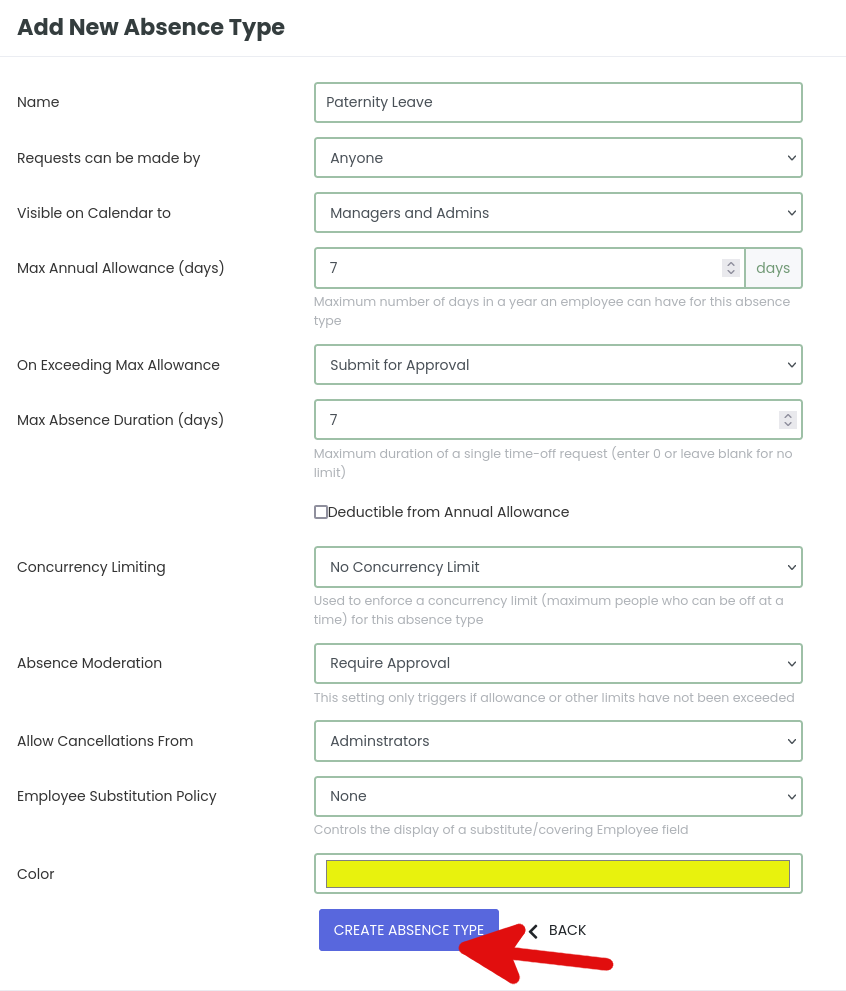
You will then be brought to the Add New Absence Type page where you will enter the following details:
-
Name of the Absence Type e.g. annual leave, maternity leave etc.
-
Requests can be made by - who can request this type of leave i.e. anyone, managers and admins, only admins.
-
Allow Cancellations From - This setting controls what user types are able to cancel time-off events for this absence type. There are three options on the drop-down menu: Employee, Managers & Administrators, Managers & Admins, Administrators.
-
Visible on Calendar to - who can view this absence type on their Calendar i.e anyone, managers and admins, only admins. For certain leave types you might not want all employees to see the leave type on their calendar but just the employee who requested it and the Administrators and Managers so as to maintain the employees privacy, rights and security. Maternity Leave would be a good example of where this could apply.
-
Summary Visibility - whether or not you want this absence to appear on absence summary breakdowns.
-
Max Annual Limit (days) - related to this specific absence type.
-
Max Monthly Limit (days) - related to this specific absence type.
-
Max Absence Duration (days) - This is the maximum duration for any time off request of this absence type.
-
On Exceeding Max Allowance - This option will only appear if you have set up a max allowance as mentioned above and allows you to decide what happens if the max allowance would be exceeded i.e. you can Submit For Approval or Block the request. If you choose Submit For Approval it will be automatically be sent for approval by the relevant person and they will be notified that it would cause allowances to be exceeded.
-
Deductible from Annual Allowance checkbox. If the checkbox is ticked then this type of absence type will be deducted from the overall annual allowance.
-
Concurrency Limiting - Used to enforce a concurrency limit (i.e. the maximum number of people who can be off at a time) for this absence type. You have five options: No Concurrency Limit, Limited Globally (across this absence type), Limited by Location, Limited by Department, Limited by Department & Location.
-
Absence Moderation - This setting only triggers if allowance/limits have not been exceeded. There are two options available, Auto Approve or Require Approval.
-
Employee Substitution Policy - This settings controls whether or not an employee can select another employee to substitute themselves when they are taking their time off. This is a per absence type setting. You will see three options on the drop-down menu: None (no substitution allowed), Optional Substitute Employee (there will be an additional optional field when requesting time off), Require Substitute Employee (there will be a mandatory field to substitute another employee when requesting time off).
-
Min Notice Period (days) - To prevent employees from requesting time-off without sufficient notice.
-
Comment policy - This can be optional or required.
-
Color - Colors are used to easily distinguish this leave from other leaves when displayed on your Calendar etc.
All of these details can be edited at any time, should you need to do so.
To Edit the following settings:
- Who can request this type of leave.
- Allow Cancellations From.
- Who can view the leave on their calendar.
- Summary Visibility.
- On Exceeding Max Allowance.
- Concurrency Limiting.
- Absence Moderation.
- Employee Substitution Policy.
- Comment policy.
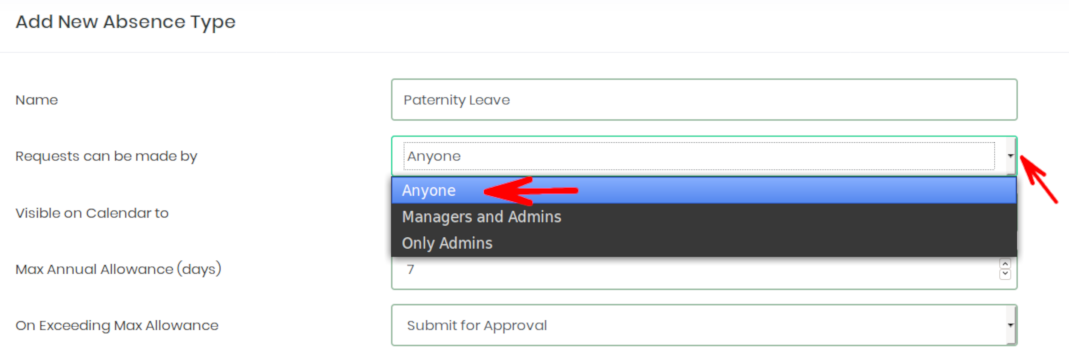
Simply click on the arrow next to these options to reveal a drop-down menu:
Then click to select the option you want from the drop-down menu displayed:
Once you have selected and/or entered an option for each field, simply click the Create Absence Type button, as shown below:
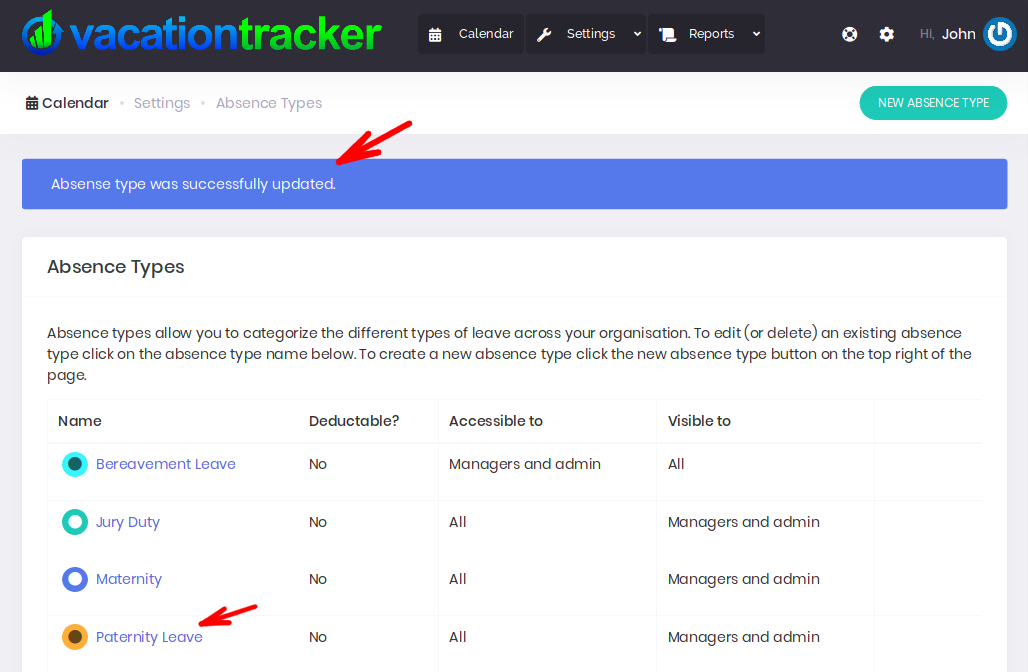
You will then be brought back to the main Absence Types Page where you will see a message informing you that your Absence type was successfully created and you will see your new Absence Type displayed below along with your other existing Absence Types:
That’s it, you have created a new Absence Type. You can repeat this process as many times as you want to create additional Absence Types.
How Do I Edit an Existing Absence Type?
From your Vacation Tracker Dashboard, click on the Settings arrow to reveal the drop-down menu and then click on Absence Types:
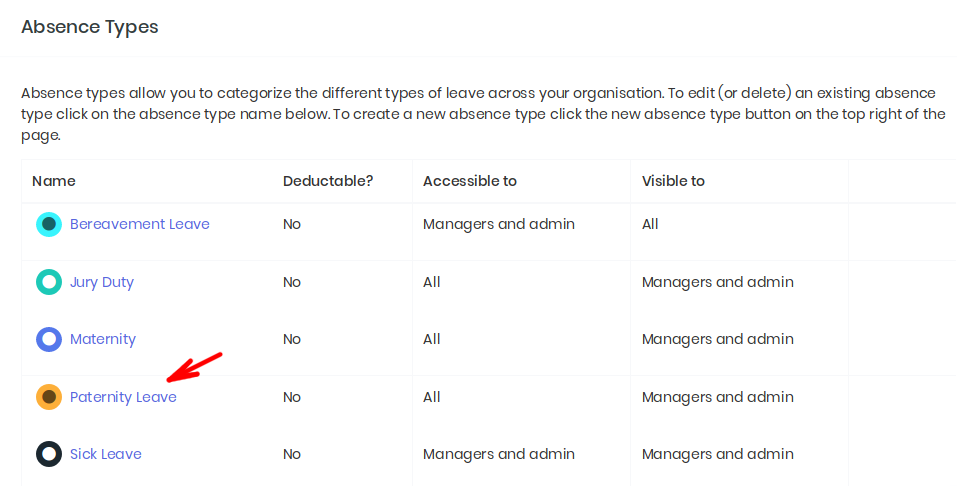
You are now on the main Absence Type page and you will see a list of existing Absence Types displayed:
From the list displayed, find the Absence Type that you wish to edit and click on it’s title to select it:
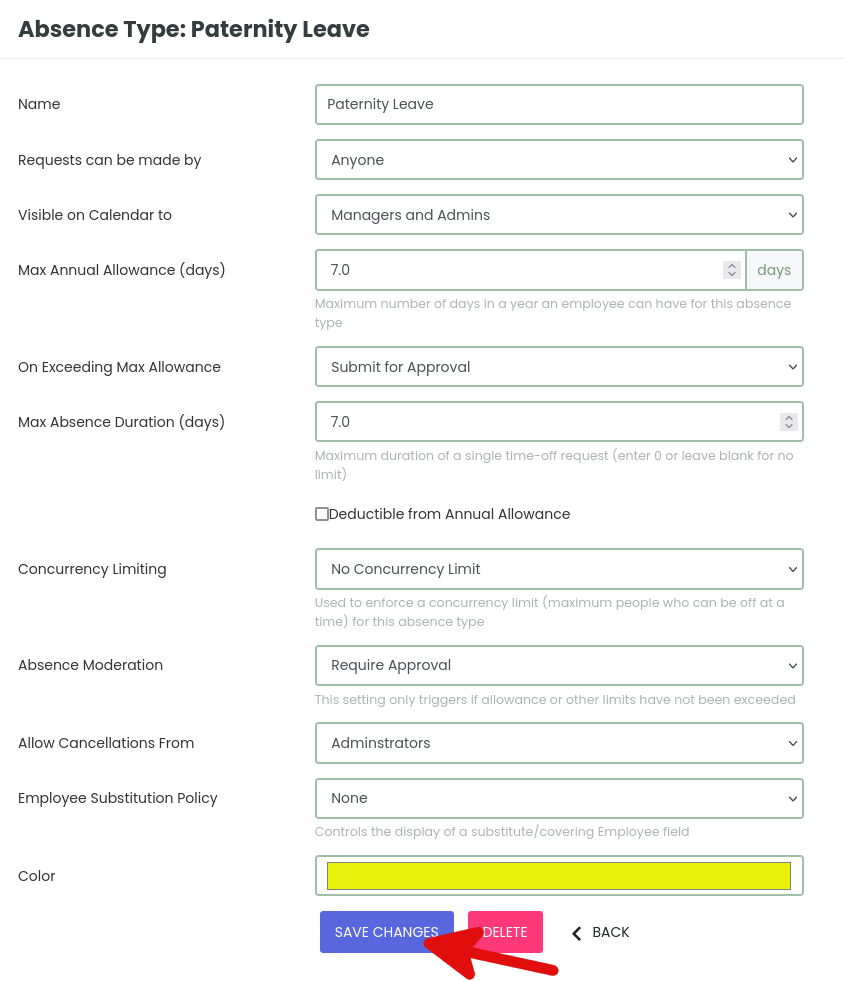
This will bring you to the specific page for that Absence Type and there you can edit all of the settings for that Absence Type. The options are edited in the same way as we have already outlined above. When you are done editing, click on the Save Changes button:
How Do I Delete an Existing Absence Type?
From your Vacation Tracker Dashboard, click on the Settings arrow to reveal the drop-down menu and then click on Absence Types:
You are now on the main Absence Type page and you will see a list of existing Absence Types displayed:
From the list display, find the Absence Type that you want to delete and click on it’s title to select it:
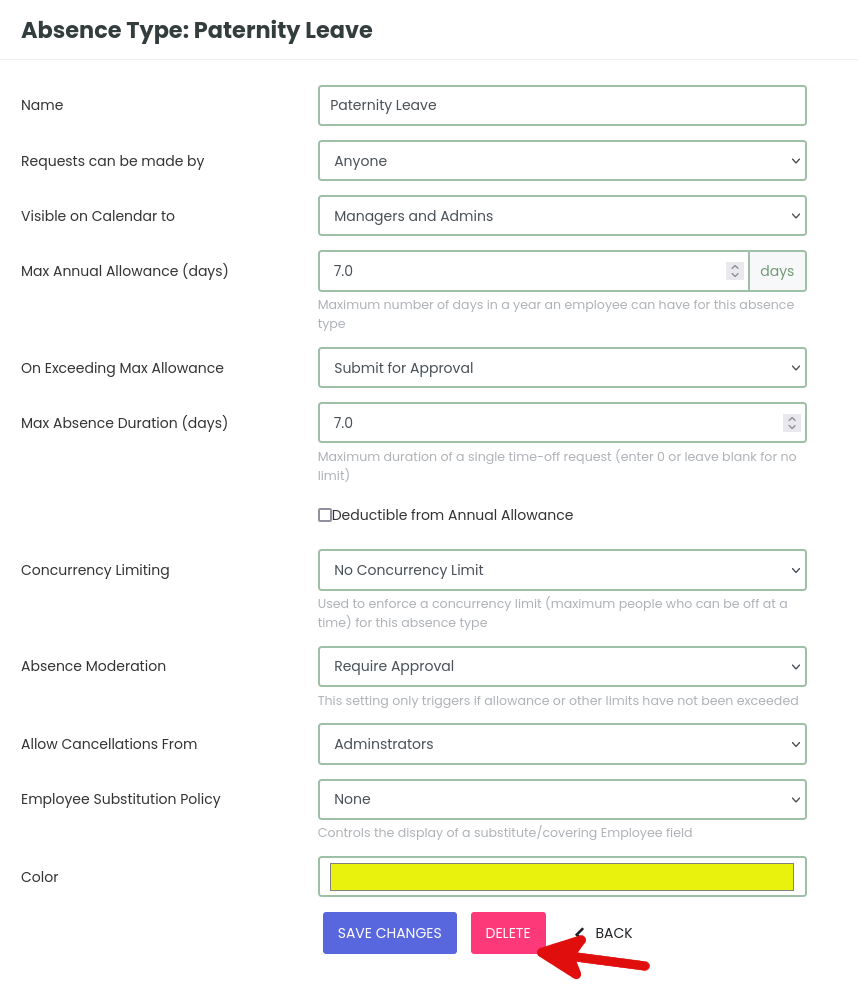
This will bring you to the specific page for that Absence Type and there you simply click on the Delete button as shown below:
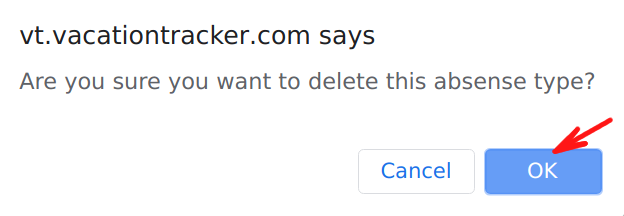
A pop-up will ask you to confirm that you wish to delete that Absence Type, simply click on OK to confirm the deletion:
That’s it, that Absence Type has been deleted and will no longer appear in the list of Absence Types available.